A guide to The Dream Libra Had: story progression, requests from inhabitants, and collectibles. Choose a topic from the contents.
Main Story
Learn the basics, follow the walkthrough, and find out about ending choices and what you can do after finishing the story.
Quests
Find the steps for each request. Choose a quest by name from the contents.
Quest Help
Learn about mechanics and things to watch out for while completing quests.
Steam Achievements
Find the requirements and steps for each achievement.
Secrets and Tips
Discover more ways to enjoy exploring and collecting.
01 / Main Story
How to Play
Help inhabitants with their problems, collect Apples, and spend time with Amili to explore deeper into the dream world.
Explore, then return to Amili
Help inhabitants to earn Apples. Talk to inhabitants to start quests. Completing their requests rewards you with Apples. You can explore and tackle quests in any order.
Give Apples to Amili to raise your charm. Return to Home, give her an Apple, and spend time together. See Raising Charm for the difference between the choices.
Explore newly opened paths. Some paths require a certain total of Heart charm and Body charm. Revisit blocked paths when your combined charm reaches 1, 3, and 10.
Advance the story at certain locations. Visiting particular places triggers main story events. Some paths open after these events, so both raising charm through quests and progressing the story matter.
01 / Main Story
Raising Charm
There are two types of charm: Heart charm and Body charm. If you are unsure what to choose, raise both evenly.
Give Apples to Amili
Bring Apples earned from quests to Amili at Home. Select “Give her an apple” to choose between these activities:
“Go for a walk together”: increases Heart charm by 1.
“Sleep together”: increases Body charm by 1.
Either choice uses one Apple and increases your combined charm by 1. You can check Heart charm, Body charm, and their total in the status menu.
Keep Heart charm and Body charm balanced
Paths open according to your combined charm. However, how you divide charm between Heart and Body affects the ending choices.
Unless you have a preference, alternate between walking and sleeping together. Aim for 5 Heart charm and 5 Body charm: this gives you the total of 10 needed for the late game and lets you choose either ending.
If one is lower, you can raise it by giving more Apples. Check that both are at least 5 before your final visit to Heart.
01 / Main Story
Walkthrough
The route from the opening tutorial through the event in Brain and your return to Heart. Quests can be completed in any order.
Story progression
Complete the tutorial in Forest 2. Follow the instructions to learn movement, conversations, and picking up items. After collecting the Apple, return to the guide and talk again to finish the tutorial.
Return to Home and meet Amili. Combined charm: 0 → 1. Leave Forest 2 to the east for Forest 1, then head north to Stomach. Take the path near the middle of its north side to Home. Give Amili the tutorial Apple and choose to walk or sleep together. At combined charm 1, the western path from Stomach to Cave 2 and the eastern path to Ice 1 open.
Explore the Forest, Ice, and Cave areas. Combined charm: 1 → 3. Help inhabitants and give Amili two more Apples. Leave requests you cannot yet finish for later. At combined charm 3, the northeastern path from Stomach to Darkness opens.
Go northeast from Stomach, through Darkness, to Accident. Required combined charm: 3. Head north through Darkness and watch the events along the way. Continue north to the crossroads in Accident and progress the event there.
Take the northeastern path from Accident to Heart. Of the two northern paths, take the eastern one first and watch the event. Afterwards, the northwestern path from Accident to Autumn 1 opens. The north and south exits of Mansion 2 also open, leading to Mansion 3 and Mansion 1 respectively.
Complete quests in the Autumn, Mansion, Coal Mine, and Hospital areas. Target combined charm: 10. From Autumn 1, head north to Mansion 1, east to Coal Mine 1, or west to Autumn 2. Hospital 1 is west of Autumn 2. Complete quests in new or previously visited areas and give Amili enough Apples to reach 10. From a total of 3, you need seven more Apples.
Head north from Cemetery to Brain. Required combined charm: 10, after the first Heart event. Go north from Hospital 1 to Hospital 2, then north again to Cemetery. At combined charm 10 or higher, its northern path leads to Brain. Watch the event inside.
Finish other quests or adjust your charm balance if needed. After the Brain event, you do not need any more combined charm to continue. This is a chance to revisit areas and finish outstanding quests. See Raising Charm for the balance needed for the endings.
Visit Heart again. When ready, return to Accident and take the northeastern path to Heart. The story continues if you have finished the Brain event.
01 / Main Story
Ending Choices
There are two endings. This page explains how to make both choices available without revealing the story.
Raise both types of charm to at least 5
With Heart charm and Body charm both at 5 or higher, you can choose between the two endings near the end of the story. If either is below 5, only one ending is available.
A combined total of 10 is not enough if it is split 7 and 3. Aim for 5 and 5 if you want both choices.
Check before your final visit to Heart
Check your Heart charm and Body charm in the status menu. If either is too low, give Amili Apples to raise it. See Raising Charm for the steps.
Once both are at least 5, continue the story and choose whichever option you prefer.
01 / Main Story
After the Ending
After the Rest ending, you can keep exploring and invite Amili to come with you.
Go out with Amili
Talk to Amili at home after finishing the story and select “Follow me”. She will follow you as you walk around the world.
This does not add or change any events.
Returning home ends the outing. You can invite her again as often as you like.
Finish remaining quests
No new main story or additional quests begin after the ending. You can continue the quests you have not finished.
You can also keep collecting paintings and other items. See Painting Locations for the painting available after the ending.
02 / Quests
Two Souls Desperate to Live
Start: Forest 3, Torrent in the northeast
Bring: 1 Hercules
Steps
Talk to Torrent in Forest 3 and hear his request.
Find and catch Hercules in the forest. It can appear in places such as Forest 4. An ordinary Beetle will not do.
With Hercules in your bag, talk to Torrent to show him what you found.
Give Hercules to Frog in the southwest of the same map, Forest 3.
Return to Torrent and report back to finish the quest and receive an Apple.
Notes
Remember to show Hercules to Torrent before handing it over. Your final answer changes the conversation, but either answer completes the quest.
02 / Quests
A Lover Reborn as Clover
Start: Forest 4, Frog in the southeast
Bring: 1 Four-leaf clover
Steps
Talk to Frog in Forest 4, ask what he is looking for, and accept his request.
Look for a Four-leaf clover among the clover patches in the forest. It is a different item from an ordinary Clover.
Put it in your bag and give it to Frog to complete the quest.
Notes
Four-leaf clover can appear in Forest 2–5. If you cannot find one, explore elsewhere and return later.
02 / Quests
The Snake and the Frog
Start: Cave 1, Snake in the northeast
Bring: 2 each of Sapphire, Emerald, Amethyst, and Ruby
Steps
Talk to Snake in Cave 1 to hear what he wants to trade.
Shoot gem-bearing Rocks in the caves or coal mines to collect two of each of the four gems. You can get a Gun at Base.
Carry all eight gems in your bag and trade with Snake to complete the quest.
Notes
Gems left at home cannot be handed over. Check that you have the required amount of each type.
Talk to the Bats in Cave 3 with the Straw doll in your bag to start the quest.
Talk to the Torrent who appears in Forest 2 and hear about the curse.
To receive an Apple, do not cast the curse. Return to Cave 3 and report to the Bats. Either answer during this report rewards you with an Apple.
Notes
If you cast the curse, reporting back still completes the quest, but you receive no Apple and the outcome is more unpleasant.
02 / Quests
Uminoke
Start: Ice 1, the Penguin fisherman in the southwest
Bring: The Uminoke received during the quest
Steps
Accept the fisherman’s request in Ice 1 and take the Uminoke.
Visit Dr. Anton in the southeast of Ice 3, hand over the Uminoke, and continue the conversation.
Pick up the items he gives you and report back to the fisherman in Ice 1 to finish.
Notes
Your choices change what you receive and the conversation when you report back, but either route completes the quest.
02 / Quests
The Poor Penguin
Start: Ice 3, the Penguin in the southwest
Bring: 1 Gardenia
Steps
Talk to the Penguin in the southwest of Ice 3 and accept his request.
Pick up a Gardenia in Forest 4 and show it to him from your bag.
Deliver Tokine's Letter to the Penguin in the southwest of Ice 4. The conversation changes depending on whether you also hand over the Gardenia.
Return to the quest giver in Ice 3 and report back to complete the quest.
Notes
You receive an Apple when delivering the letter, but the quest is not complete until you make the final report.
02 / Quests
The Selfless Penguin
Start: Ice 2, the Penguin on the north side
Bring: Nothing
Steps
Talk to the Penguin on the north side of Ice 2.
Accept the Apple, choose your answers, and finish the conversation.
Notes
You do not need to collect items or visit another location. Choose whichever answers you prefer.
02 / Quests
Mushroom of His Dreams
Start: Coal Mine 3, the Coal Miner in the southwest
Bring: 1 Matsutake or Mushroom
Steps
Talk to the Coal Miner in the southwest of Coal Mine 3 and accept his request.
Look for Matsutake in Autumn 1 or Autumn 2. You can also give him an ordinary Mushroom from the Forest or Autumn areas.
Carry either item in your bag and give it to him.
Notes
The conversation depends on which item you give him, but either earns an Apple.
02 / Quests
The Unsuccessful Painter
Start: Coal Mine 2, the Coal Miner who paints
Bring: "Love", received during the quest
Steps
Accept the painter’s request to help sell his work in Coal Mine 2.
Take "Love" to the art-loving Pumpkin on the east side of Mansion 2 and sell it.
Return to the painter in Coal Mine 2 and report back.
Notes
See Painting Locations for how to get the painting for your collection after selling it.
02 / Quests
The Child of the Mansion
Start: Mansion 1, the Pumpkin child
Bring: "The Hardworking Coal Miner", received during the quest
Steps
Accept the Pumpkin child’s request to deliver a painting in Mansion 1.
Give "The Hardworking Coal Miner" to the Coal Miner in the northeast of Coal Mine 1.
Return to the child in Mansion 1 and report back.
Notes
Talking to the Coal Miner again starts a conversation about buying the painting back. This is separate from completing the quest, so you do not have to pursue it.
Only do this if you want to collect all the paintings.
02 / Quests
Elixir of Immortality
Start: Mansion 3, the Pumpkin in the northwestern room
Bring: 1 Elixir and a gun
Elixir. Use this appearance to distinguish it from other medicines.
Steps
Accept the request to find medicine from the Pumpkin in the northwestern room of Mansion 3.
Find an Elixir in places such as the northwestern room of Hospital 1, then give it to her.
After handing it over, talk to the other Pumpkin in the northeastern room.
Shoot and kill the Pumpkin in the northwestern room who received the Elixir.
Report to the Pumpkin in the northeastern room to complete the quest.
Notes
Handing over the Elixir alone does not complete the quest. Continue the conversations afterwards. This quest is one of the exceptions to reviving inhabitants.
02 / Quests
A Hero Built on Sacrifice
Start: Hospital 2, the Doctor in the northeast
If you dislike horror, you can skip this request without accepting it. The main story can still continue, but you will also be unable to progress Please Stay with Me Forever, which requires this quest to be completed.
Bring: Nothing
Steps
Listen to the Doctor in the northeast of Hospital 2 and accept the request. Either answer to the question that follows is fine.
In Hospital 2 (Night), talk to all four people in the northeastern room.
Talk to the additional person who then appears to the south.
Press the nearby light switch to return to the normal hospital, then finish the conversation with the Doctor. When the question is asked again, you may keep or change your answer. Either choice completes the quest.
Notes
This quest contains horror sequences and restricts travel through the map menu while it is in progress. After completing it, use the light switches to move between the normal and night versions of the hospital.
02 / Quests
Please Stay with Me Forever
Start: Hospital 1 (Night), the Ghost in the northwestern room
Accept the request from the Ghost in the northwestern room of Hospital 1 (Night).
Use a light switch to return to the normal hospital, visit the person named in the request, and carry it out.
Return to the Ghost in the night hospital and report back.
Notes
Accept the request before taking action. If the quest giver is missing, see Reviving Inhabitants.
Show the exact action after accepting the request (quest spoilers)
After accepting the Ghost’s request, shoot and kill the Doctor in the northwestern room of the normal Hospital 1. Then return to the night version and report to the Ghost.
02 / Quests
Ancient Romance
Start: Mansion 2, the Pumpkin in the southwest
Bring: A completed Dinosaur Fossil
Steps
Talk to the Pumpkin in the southwest of Mansion 2 and accept his request.
Collect fossil parts in the caves and coal mines, then follow Assembling the Fossil to put them together.
Carry the completed Dinosaur Fossil in your bag and give it to him.
Notes
Having all seven types of parts is not enough. You must assemble them into the finished item first.
02 / Quests
A Taste of Photosynthesis
Start: Cosmos, the alien who talks about food
Bring: 1 each of Curry, Steak, Stir-fried vegetables, and Omurice
Talk to the alien who discusses food and ask both questions to start the request.
Collect Curry, Steak, Stir-fried vegetables, and Omurice through Amili’s Cooking.
Carry the dishes in your bag and give them to the alien. The quest ends once all four have been handed over.
Notes
You can give the dishes one at a time as you obtain them. Cookies, Lunchbox, and Unaju do not count for this request.
03 / Quest Help
Killing Inhabitants
Killing an inhabitant you can talk to prevents you from progressing their quests. Check your target before using a gun.
Look for the conversation icon
Some inhabitants look much like wild creatures. Check for the conversation icon above their heads before firing.
If you shoot by accident, leave before they die
Shooting an inhabitant stops you from talking to them. If they are still alive, stop attacking, leave the map, and return to talk to them again.
If you have killed them, there is a way to recover in many cases. See Reviving Inhabitants for the steps.
Some quests require killing
In some quests, you deliberately kill an inhabitant as part of the request. Follow the instructions and conversations for that quest.
Some deaths caused by quest events cannot be reversed. The relevant quests are listed under Reviving Inhabitants.
03 / Quest Help
Breaking Items
Some items can release other items when you break them with a gun.
Breaking Rocks
Caves and coal mines contain two different types of Rock: one can contain gems, and the other can contain fossil parts. Their appearance differs, so look for the kind you need.
This type of Rock can drop gems when shot. Gems are used in trades and quests.This type of Rock can drop parts used for Assembling the Fossil.
Breaking Ice
Breaking chunks of Ice in the Ice areas and elsewhere can release Fish and sometimes rarer creatures.
Fossil parts can be arranged and assembled, not just collected.
Collect all seven parts
Shoot Rocks like the one pictured below in the caves and coal mines to find fossil parts. These differ from ordinary Stones and gem-bearing Rocks. A Gun can be found at Base.
You need one of each: Fossil (Head), Fossil (Body), Fossil (Right arm), Fossil (Left arm), Fossil (Right leg), Fossil (Left leg), and Fossil (Tail). Duplicate parts cannot replace missing ones, so check their names.
A Rock that can contain fossil parts.
Arrange them in your bag or on the ground
Arrange the pieces like a jigsaw puzzle inside your bag or on the ground. You can also assemble them at home.
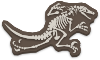
Place the body in the middle, the head at the upper right, the tail to the left, the arms above the body, and the legs below it. Use the finished shape below as a guide and adjust the overlaps.
When correctly arranged, the parts automatically become a single Dinosaur Fossil. If it does not work, check that the left and right limbs are not swapped.
Give the completed item to the quest giver for Ancient Romance, or keep it as a decoration at home.
03 / Quest Help
How to Reach Cosmos
The mysterious marking on the ground in Coal Mine 3 is the entrance to Cosmos.
Register your location while standing on the marking
Head east from Autumn 1 into Coal Mine 1, then go south to Coal Mine 3.
Stand on the mysterious marking on the east side of Coal Mine 3. The map icon turns green when you are in the right spot.
Open the map menu, select an empty slot, and choose “Register current place”. It registers Spaceport instead of your normal location.
Select the registered Spaceport and choose “Go to the registered place”.
Board the UFO on the east side of Spaceport to reach Cosmos.
Returning from your trip
Cosmos has inhabitants to talk to and a quest to complete. Register a familiar location too, so you can easily return.
03 / Quest Help
How to Reach the Hospital at Night
Progressing a particular quest lets you visit the night version of the hospital.
Progress through A Hero Built on Sacrifice
Accept A Hero Built on Sacrifice from the Doctor in Hospital 2. The quest takes you to Hospital 2 (Night).
After completing the quest, use the hospital light switches to move between the normal and night versions. The switch in Hospital 1 takes you to Hospital 1 (Night).
You can start Please Stay with Me Forever in Hospital 1 (Night). If you skip A Hero Built on Sacrifice because you dislike horror, you can skip this quest as well.
03 / Quest Help
Missable and Irreversible Choices
Some quest choices and lost items cannot be undone or recovered. Here are the things to keep in mind.
Charm
You cannot reassign charm points once you have earned them. To make both endings available, you need at least 5 Heart charm and 5 Body charm.
There are 15 quests. Together with the tutorial, their rewards provide up to 16 Apples. If you put 12 or more points into one type of charm, those Apples alone will not leave enough to raise the other to 5. You have less room for error if you miss an Apple reward, for example by casting the curse.
If you want both ending choices, raise Heart and Body to 5 each first. See Raising Charm.
If your points are unbalanced and you run out of Apples, extra Apples in Forest 2 provide a fallback.
Quest outcomes
For most quests, you can choose the answers you prefer. However, once an outcome is settled, you cannot change it to another route later. The inhabitants’ conversations afterwards reflect the route you chose.
Below are the choices that affect survival or item collection.
Saving after an ending
If you save after an ending, you cannot see the other ending from that save. Raising more charm after finishing the story does not let you choose the ending again.
To see both, keep a save from before the ending with Heart charm and Body charm both at least 5. Save your post-ending progress in a different slot rather than overwriting that earlier save. See Ending Choices.
Choosing the fatal route in How to Cast a Curse
How to Cast a Cursecan be completed while keeping the inhabitant alive. If you actually cast the curse, however, the inhabitant dies and revival cannot bring them back.
To take the survival route, report back without casting the curse. Casting it still allows you to complete the quest, but you receive no Apple.
Losing "The Hardworking Coal Miner" after buying it back
You can trade gems to recover "The Hardworking Coal Miner" after delivering it in The Child of the Mansion. However, you can only buy it back once. If you then leave it outside or destroy it, you cannot get it again. Store it at home for your collection.
If you have not yet unlocked Art collector, losing this painting prevents you from collecting all 23 in that save. See Painting Locations for how to buy it back.
If you lose it before first delivering it to the Coal Miner, the child who gave you the quest can provide another copy.
Losing Anton's Letter
Depending on your choices in Uminoke, you may receive Anton's Letter. It cannot be replaced if lost. To take the route where you deliver the letter, pick it up and keep it in your bag until reporting to the fisherman.
Either outcome completes the quest and rewards an Apple. Losing the letter does not prevent quest or achievement completion.
Amili’s item reactions
Comments about items placed at home can be heard once per type of reaction. Putting an item down again does not replay a comment. Some items share a reaction, while certain combinations have a separate one.
Displaying many paintings at once can make you miss the reactions to smaller collections. To hear them all, display one painting and talk to Amili, then increase the collection to 10, and finally to all 23.
Arrange all seven fossil parts correctly to create a completed Dinosaur Fossil.
See Assembling the Fossil for where to find the pieces and how to arrange them. You can unlock this before handing over the finished fossil for the quest.
04 / Steam Achievements
Space traveler
Went to space
How to unlock
Board the UFO at Spaceport and arrive in Cosmos. Reaching Spaceport alone is not enough.
Have all 23 paintings at the same time across your bag and home combined. Merely having picked them up in the past is not enough, so store your collection at home.
The achievement unlocks when you pick up the final missing painting. You need all three different paintings named "Space War" as well.
See Painting Locations for images, locations, and how to recover paintings handed over during quests.
04 / Steam Achievements
Pink penguin
Captured pink penguin
How to unlock
Catch a Pink Penguin that can appear when you break Ice, and put it in your bag. Finding one without catching it is not enough.
Kill a unique inhabitant such as a quest giver. Defeating ordinary creatures that appear around the world does not count.
Some quests unlock this as part of their progression, so you do not need to kill an extra inhabitant just for the achievement. See Killing Inhabitants for precautions.
05 / Secrets and Tips
Death
If attacks from creatures or other enemies reduce your HP to zero, you die and are sent back Home.
There is no death penalty
Your HP recovers when you return home, and you can set out again. You do not lose items or charm. Your quest progress is also preserved.
A special event with Amili
Being sent home after dying lets you see a special event with Amili.
05 / Secrets and Tips
Amili’s Cooking
With a Kitchen at home, Amili may prepare meals or snacks while you are out.
Set up a Kitchen and go exploring
Bring a Kitchen home and keep the space in front clear of furniture so Amili can use it. If she is cooking when you return, talk to her to receive the meal. She does not cook every time, so check in between trips.
The four regular dishes are Curry, Steak, Stir-fried vegetables, and Omurice.
Separately, she may give you Cookies or a Lunchbox. These also require a Kitchen at home.
Leave an Eel for Unaju
If you leave an Eel in the room, Amili uses one when cooking and makes Unaju instead of a regular dish. Leave it in the room, not in your bag. See Rare Items for how to find an Eel.
Set the table with a Table mat
Place a Table mat on the table at home and Amili will put her cooking on it.
05 / Secrets and Tips
Amili’s Special Reactions
The items and furniture you place at home can change Amili’s comments and what she does while you are away.
Special comments for item combinations
Place these combinations in the room and talk to Amili to hear comments different from those for individual items.
Put Ice and a Penguin together. It is best to place the Penguin alone and hear Amili’s reaction before adding the Ice.
Collect all four gems: Sapphire, Emerald, Amethyst, and Ruby.
Collect all three types of Motorcycle.
Place three or more Bear stuffed toys.
She may react to other items first, so try talking several times.
With a Sofa, TV, or Audio system in the room, you may come home to find Amili relaxing on the Sofa or spending time in front of the TV or Audio system.
Keep the space in front clear so she can use the furniture. Her activities vary, so see what she is doing whenever you return from exploring.
05 / Secrets and Tips
Painting Locations
There are 23 paintings, mostly hanging on walls in the hospitals and mansions. Approach a painting and put it in your bag to take it home.
There are three different paintings named "Space War". Use their images to tell them apart and collect all three.
All 23 painting locations. Directions refer to the map.
Image
Painting
Map
Location / requirement
"Wraith"
Mansion 1
Wall near the center
"Space War"
Mansion 1
Wall near the center
"Space War"
Mansion 1
Northwestern wall
"Space War"
Mansion 1
Northeastern wall
"1203"
Mansion 2
Middle of the eastern wall
"In a Certain Place"
Mansion 2
Middle of the eastern wall
"The Second Space War"
Mansion 2
Southeastern wall
"The Witches' Workshop"
Mansion 2
Northern wall
"Orange"
Mansion 3
Southeastern wall
"Jamie"
Mansion 3
Northeastern wall
"Night Blue"
Mansion 3
Northwestern wall
"Dr. Libra"
Mansion 3
Northwestern wall
"Unsung Kingdom"
Mansion 3
Southwestern wall
"Mad Pumpkin"
Mansion 3
Northeastern wall
"Solitude"
Hospital 1
Middle of the northern wall
"Happy Ending"
Hospital 1
Northwestern wall
"Lilia"
Hospital 1
Middle of the southern wall
"Deep Sea"
Hospital 1
Middle of the southern wall
"Sunset"
Hospital 2
Northeastern wall
"Withered Fruit"
Hospital 2
Middle of the southern wall
"Love"
Mansion 2
Appears on the northern wall when you re-enter after selling it.
"The Hardworking Coal Miner"
Coal Mine 1
Buy it back from the Coal Miner who received it.
"The Dream Libra Had"
Stomach
Northwest; appears after the Rest ending.
Paintings connected to quests
"Love": Received in The Unsuccessful Painter. After selling it to the collector in Mansion 2, leave and re-enter the map. It will be on the wall, where you can take it.
"The Hardworking Coal Miner": Received in The Child of the Mansion and delivered to the Coal Miner in Coal Mine 1. Talk to him again about buying it back, then give him one each of Sapphire, Emerald, Amethyst, and Ruby to recover it.
"The Dream Libra Had": Appears in the northwest of Stomach after the Rest ending.
Store your collection at home
Art collector requires all 23 paintings across your bag and home combined. You can keep all of them at home or carry some in your bag. Recover those used in quests and keep the whole collection.
05 / Secrets and Tips
Rare Items
Ice can conceal unusual creatures as well as Fish.
Break Ice to look inside
Try breaking Ice in the Ice areas and elsewhere with a gun. You may find the following:
Eel Bring it home and it can become Unaju through Amili’s Cooking.
Pink Penguin A rare pink-colored Penguin. Catch it and bring it home to see a special reaction from Amili.
05 / Secrets and Tips
Straw doll
The Straw doll you can take from Frog in Cave 2 has a strange habit of returning after being discarded.
It returns to its original owner
Discard the Straw doll outside your home, leave that map, and talk to Frog in Cave 2. The discarded doll has returned to him, and you can take it again along with a special reaction.
It does not return to Frog if you store it at home.
Bring it home or show it to inhabitants
Place the Straw doll at home and talk to Amili for a special comment. Carrying it also lets you start How to Cast a Curse.
05 / Secrets and Tips
Tissue
Where you place Tissue affects Amili’s reactions and events at home.
Put it near the bed and talk to Amili
Place a nonempty Tissue box near the bed in the upper-right part of the room and talk to Amili for a special comment. Placing it elsewhere does not trigger this reaction.
If she comments on other furniture first, keep talking to her. This comment can only be heard once.
It may be used while you are away
After hearing the special comment, leave the Tissue by the bed and go out. Amili may use it by herself. This can happen on some occasions when you return to find her in bed, but not every time.
If it has been used, her usual “Sorry, I fell asleep.” is replaced by a special, flustered line. Used tissue also appears around the bed.
It can also be used when you choose “Sleep together”
Leave a nonempty Tissue box near the bed, give Amili an Apple, and choose “Sleep together”. Tissue is used during your time together and Used tissue appears afterwards.
Throw away empty boxes and used tissues
As Tissue is used, it may run out and become an Empty tissue box. An empty box cannot be used, so put out a fresh one if you want to see more events.
Pick up Used tissue and Empty tissue box, then drop them from your bag onto a Trash can to throw them away. A box with Tissue still inside cannot be discarded this way.
05 / Secrets and Tips
Buying Drinks
Vending machines are functional: insert a coin to buy a drink.
Drop a coin into a Vending machine
Stand near a Vending machine and drop one Gold coin or Silver coin from your bag onto the upper part of its front. The coin is spent and a drink appears at your feet.
You receive either Coke or Tea at random. Either kind of coin buys one drink.
The same method works if you bring a Vending machine home.
05 / Secrets and Tips
Stomach
Stomach connects several areas and is also a place where food you have eaten reappears.
Eaten food returns in the small southwestern room
After using food from your bag to restore HP, visit Stomach. The food you ate appears in the small room at the bottom left of the map. You can pick it up again even though it was consumed.
After eating a meal or other food, check the little room on your way home.
05 / Secrets and Tips
Reviving Inhabitants
You can revive inhabitants you have killed at the shrine in Forest 2. Some deaths caused by quest events are exceptions.
Put a coin in the offering box in Forest 2
After killing an inhabitant eligible for revival, a torii gate and offering box appear on the north side of Forest 2, where you completed the tutorial. Drop one Gold coin or Silver coin from your bag onto the offering box to revive all eligible inhabitants. The message “A miracle has happened” confirms it worked. Return to their locations to check.
Quest progress is not reset. Quests involving revived inhabitants continue from their current stage.
What about deaths during quests?
Inhabitants who die as part of the following quest events cannot be revived at the shrine.
A fallback for when you have not earned enough Apples in the areas you can reach and cannot raise your charm enough to continue.
If quests are providing enough Apples, you do not need to use this. Keep exploring and progressing the story.
Look for Apples in Forest 2
After giving Amili your first Apple and raising your charm, visit Forest 2 with no Apples in either your bag or your home. An Apple may reappear where you found the tutorial one.
It does not appear every time. If you are stuck because you lack Apples, try leaving and re-entering Forest 2.
Give any Apples you find to Amili to raise your charm, just like quest rewards.